

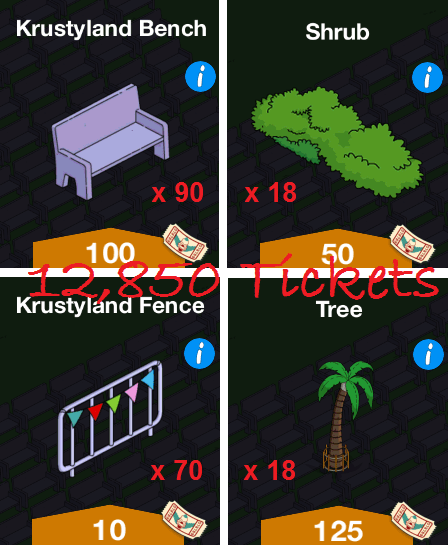
What’s crackalackin Addicts?
Well, it’s 3D Thursday and I thought today we could have some fun in Krustyland (KL) for a change. I don’t know about you but my poor theme park has been pretty neglected for quite a while. Sure I threw my new rides from the various holiday events in there but haven’t done much else.
Well, I’m ashamed of myself. I’m a Disneyland Annual Passholder and go all the time and still have a so-so KL. You’d never guess how much I love amusement parks by looking at my designs. (Well, the pathway to the castle with the Krusty Statue in front of it might give you a guess but that’s not the point.) Thankfully, other Addicts aren’t as neglectful of KL as me. Over at TOuk, I saw this amazing 3D Design from Steven Itman and liked it a bunch. With his permission, I thought we’d do a little 3D tutorial. Sound good? If yes, click more….
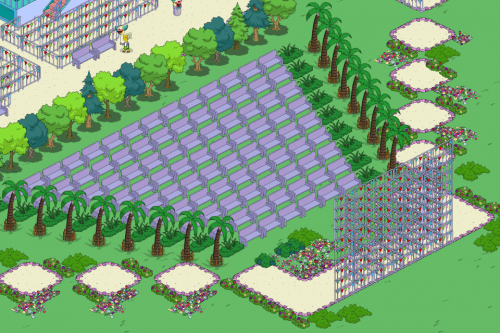
So for my design, I drew inspiration from this but kept my design pretty basic. If you want to have a go with it, the tinkering and elaboration is all up to you. First off, here’s what you need to make this.
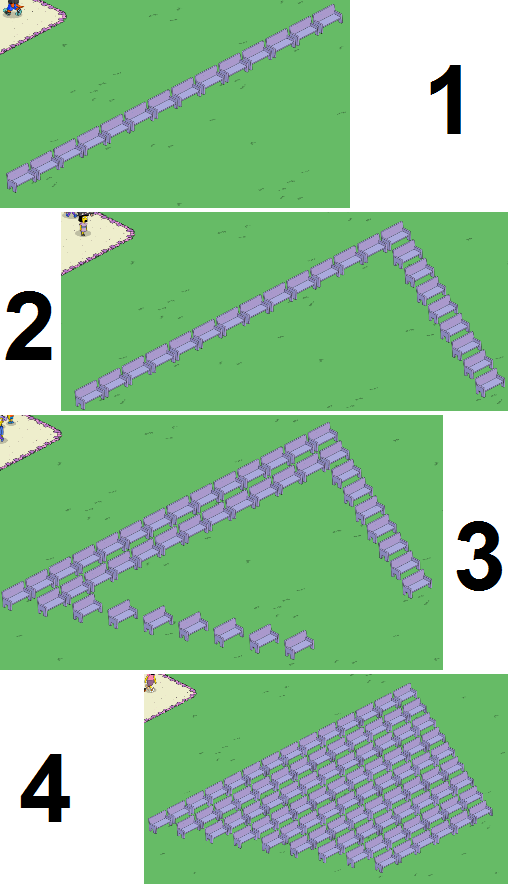
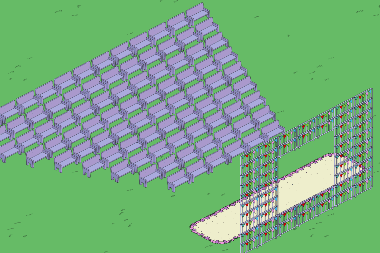
Not too expensive. Using the purple benches, I started to make my seating area. The back row is 13 benches. You can see that you just offset the next row and bring it in a little to make the sloped effect. I copied Steven’s bleachers completely but you can make this as big or as small as you want to.
To make sure my viewing screen jive with the bleachers, I started on this next. Making sure this is lined up is way important for the effect. My original screen was 10 high and 6 wide facing towards the benches.
After putting down my walkway (NOTE: You may want to do this first before designing anything), I decided my screen needed to be 7 wide instead. At this point I also decided to start doing some of my own touches so I left the screen open hoping inspiration would strike.
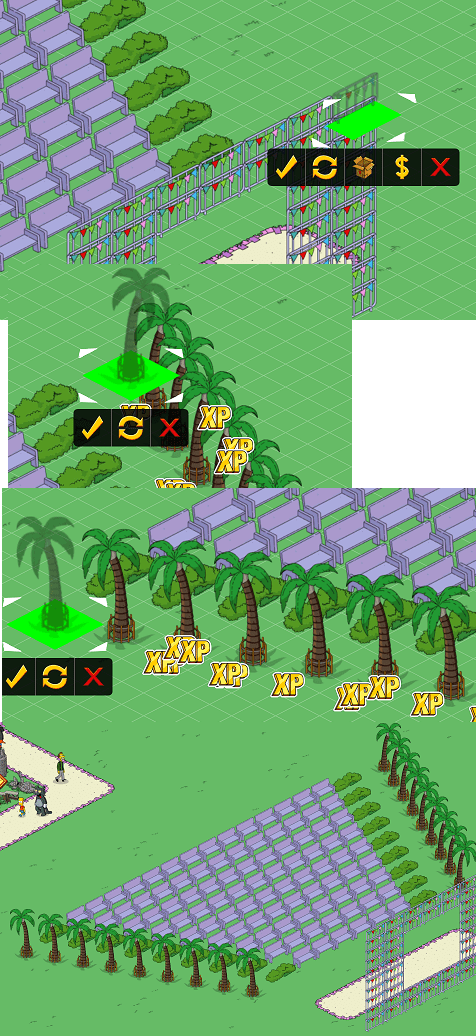
Next up, placing shrubs at the ends of the bench rows.
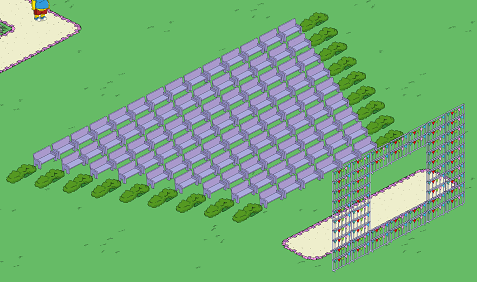
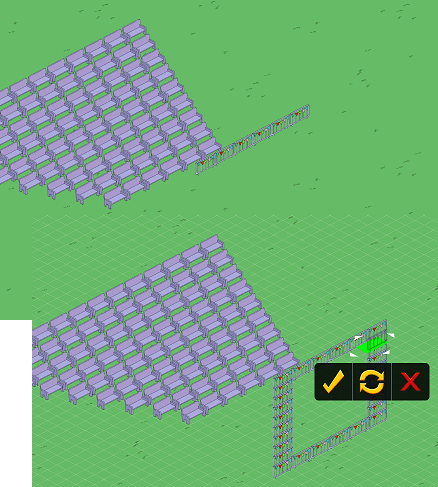
To add to the slope effect, I then placed Palm trees on the edges of the bushes creating a grass aisle-way. I had to change the direction of a couple fences at the top of the screen also to accommodate the bottom right tree.
And that really is the basic theater. The rest is all up to you. I decided to do the paths a little different in my design.
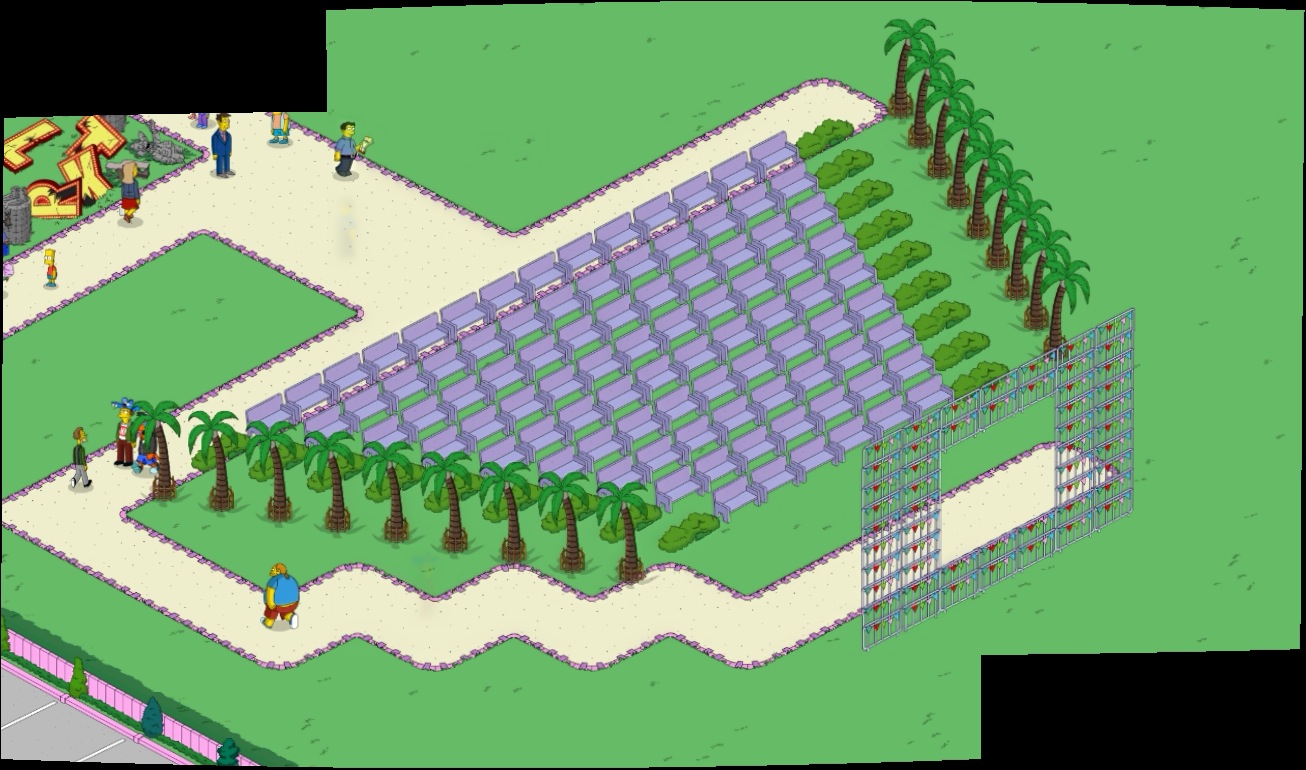
My last little touch was use the Viking Ship ride as the show. I can totally see Krusty having people pay tickets for that ride while also having other schmucks pay tickets to watch the ride thinking they are seeing an original Viking show. Also added some fences to support the screen.

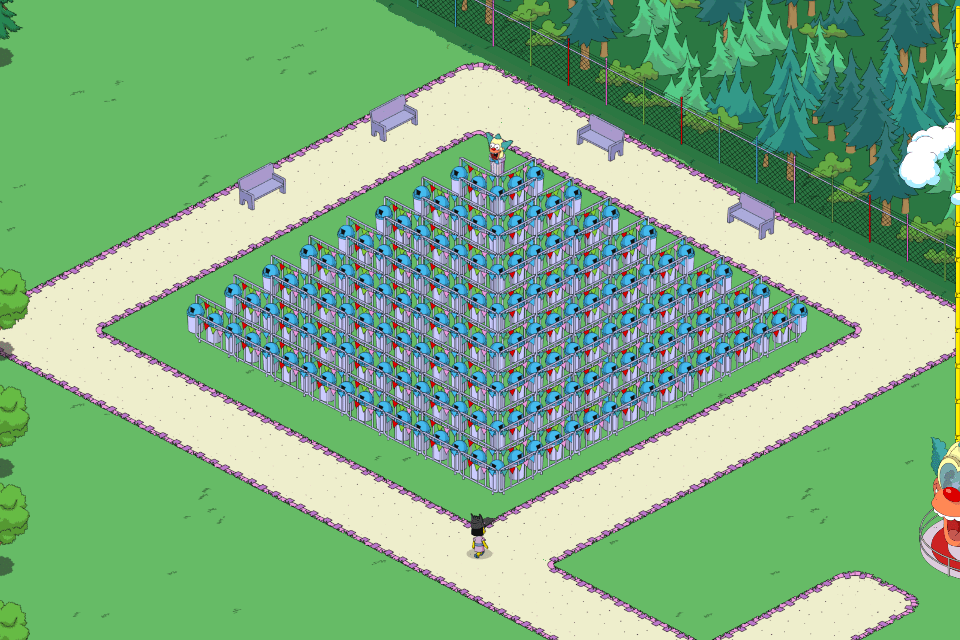
And there you go. Something cool you could build in your free time. You could also do this in your Springfield if you liked. Steven also has done some other really cool things with 3D in his Krustyland. Check out this Pyramid.
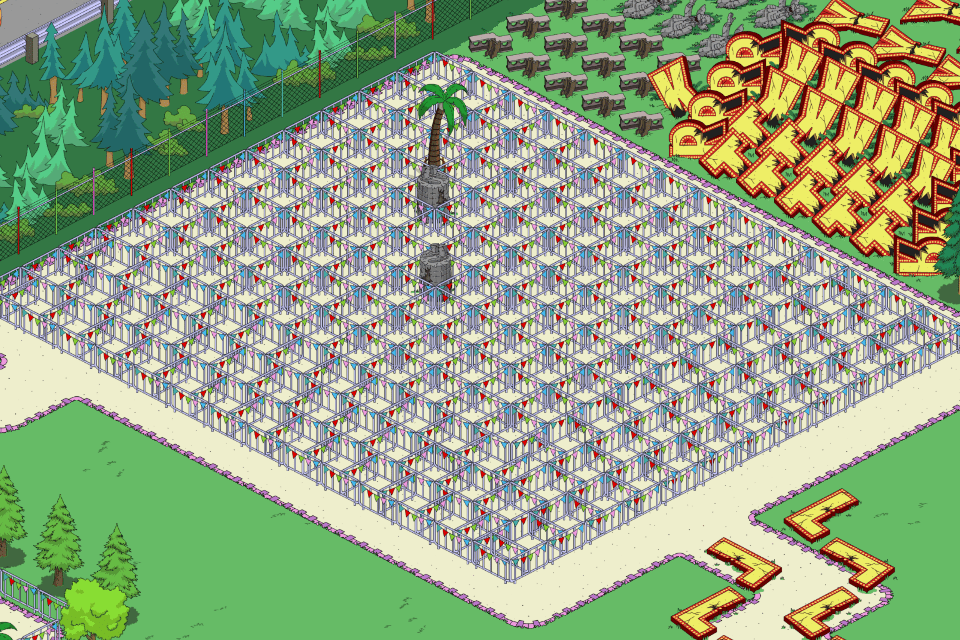
He also made an amazing 3D ride platform. The first time I saw something like this was from my buddy Shelfcleaner but I dig Steven’s take on it.

I really dig when people design new and different things. Here’s another interesting texture thing in his town.
Inspired by all this creativity in KL, I even made a new opening area in my Design Town. Now this is what I call garbage time.

Well, hope you liked all this and that at least a couple of Addicts feel inspired to tweak their amusement parks. While a bit more limited than Springfield, there still are a lot of options.
Because this is a 3D post, I thought I’d show you a new 3D creation I started working on in my main town. With all the talk we had about the Springfield Monorail, I decided my town would have one with or without EA. This is a prototype aka Mark 1 but I think it’s pretty nifty. Luann must be a shrewd businesswoman to have gotten that kind of advertising.

Still needs some tweaking. Please feel free to use this and improve on it if you like. Well, that’s enough for one 3D Thursday. Shout out in the comments if you like. Also feel free to share any of your own designs. You can put them on our Flickr, email us at tstoaddictsblog@gmail.com or link it to one of your fancy schmancy image thingamajiggers in the comments.
TTFN… Wookiee out!